Deliver and secure ingress for APIs in Kubernetes
You currently have a K8s cluster with an API (micro)service and want to deliver it to production with additional features and protection, like rate limiting, authentication, and DDoS protection.
In this guide, you'll learn how to implement ngrok as an API gateway, using the ngrok Kubernetes Operator, in these steps:
- Apply the ngrok Kubernetes Operator to your cluster
- Configure your cluster to use ngrok as an API gateway
- Set up Traffic Policy to shape traffic into/out of your API service
What you'll need
ngrok account
Any tier will do— register now.
A reserved domain
Grab yours in the ngrok dashboard.
A Kubernetes cluster
... and optionally, a functioning API service. If you don't yet have one, you can install our
demo service
.
kubectl and Helm
Both installed locally on your workstation.
Why use the K8s Gateway API for your API gateway?
Kubernetes has two APIs for handling ingress from external traffic into your cluster's internal network: the original Ingress Controller or the Gateway API.
The ngrok Kubernetes Operator supports both mechanisms. While we encourage you to explore both, we recommend the Gateway API based on the following:
- The Ingress API, which Ingress Controllers utilize, is frozen in new versions of K8s and no longer receives updates.
- While the Ingress Controller is designed purely for ingress, the Gateway API is also designed for dynamic infrastructure provisioning and advanced traffic routing.
- The Gateway API is role-oriented, allowing DevOps/platform/infrastructure engineering teams to control clusters, policies, and permissions centrally, while still allowing API developers to self-service endpoints to their services with route objects.
- The Gateway API provides a common interface to K8s networking, removing reliance on vendor-specific configurations.
- Many developers can integrate their APIs or apps onto a single
GatewayClassorGateway, usingHTTPRoutes, without affecting others.
For the scope of this guide, and based on this recommendation, we'll focus on Gateway API.
Step 0. Deploy the example ngrok API service
If you're building a proof of concept with ngrok as the API gateway for your
APIs in Kubernetes, you can use our example ngrok API
service. This service
responds to all routes with information about the connection—think of it
as the pong to your curl.
If you already have an API service, you can skip this step—just be aware that you'll need to edit the example configurations below to properly configure the ngrok Kubernetes Operator.
To deploy the ngrok API service to your cluster, create the prod namespace and
apply its deployment.yaml file.
kubectl create namespace prod
kubectl apply -f https://raw.githubusercontent.com/ngrok-samples/ngrok-api-service/refs/heads/main/kubernetes/deployment.yaml
Step 1. Apply the ngrok Kubernetes Operator
Add the ngrok Kubernetes Operator repo to Helm.
helm repo add ngrok https://charts.ngrok.com
helm repo update
Apply the latest Gateway API CRDs to your cluster.
kubectl apply -f https://github.com/kubernetes-sigs/gateway-api/releases/download/v1.0.0/standard-install.yaml
Set up a few environment variables to help apply the ngrok Kubernetes Operator.
{AUTHTOKEN}: An ngrok authtoken—you can use either your default authtoken or create a new authtoken for this deployment.{API_KEY}: An API key, created in the ngrok dashboard to associate with your deployment.
export NGROK_AUTHTOKEN={AUTHTOKEN}
export NGROK_API_KEY={API_KEY}
Install the ngrok Kubernetes Operator into the previously-created prod namespace with
Gateway API functionality enabled.
helm install ngrok-ingress-controller ngrok/kubernetes-ingress-controller \
  --namespace prod \
  --create-namespace \
  --set credentials.apiKey=$NGROK_API_KEY \
  --set credentials.authtoken=$NGROK_AUTHTOKEN \
  --set useExperimentalGatewayApi=true
Step 2. Configure your cluster to use ngrok as an API gateway
For ngrok to operate as your API gateway, using the native Gateway API, you need to configure the following:
- A
GatewayClassthat uses the controller from the ngrok Kubernetes Operator project. - A
Gatewaywith at least onelistenerattached to the ngrok domain you already reserved. - At least one
HTTPRoute, with yourGatewayas its parent, that matches paths to one or more existing API services (in any namespace) based on theirnameandport.
Create the API gateway configuration
Create a new YAML file named ngrok-api-gateway.yaml and paste in the following
content.
First, replace {YOUR_NGROK_DOMAIN} with the domain you reserved.
If you're using the example API service from Step 0, substitute
{YOUR_SERVICE_NAME} with ngrok-api-service and {SERVICE-PORT} with 80.
If you're deploying your own API service, change those variables accordingly, and
edit the prod namespace to match the namespace where your service is already
running. If you have multiple API services in different containers, you'll need
to create multiple rules to match paths to services.
apiVersion: gateway.networking.k8s.io/v1
kind: GatewayClass
metadata:
  name: ngrok-gatewayclass
  namespace: prod
spec:
  controllerName: ngrok.com/gateway-controller
---
apiVersion: gateway.networking.k8s.io/v1
kind: Gateway
metadata:
  name: ngrok-gateway
  namespace: prod
spec:
  gatewayClassName: ngrok-gatewayclass
  listeners:
    - name: ngrok-listener
      hostname: {YOUR_NGROK_DOMAIN}
      port: 443
      protocol: HTTPS
      tls:
        mode: Terminate
        certificateRefs:
          - name: ngrokcert
---
apiVersion: gateway.networking.k8s.io/v1
kind: HTTPRoute
metadata:
  name: ngrok-route
  namespace: prod
spec:
  parentRefs:
    - kind: Gateway
      name: ngrok-gateway
  hostnames:
    - {YOUR_NGROK_DOMAIN}
  rules:
    - matches:
        - path:
            type: PathPrefix
            value: /
      backendRefs:
        - name: {YOUR_SERVICE_NAME}
          port: {SERVICE_PORT}
          kind: Service
Write the manifest to disk and apply to your cluster.
kubectl apply -f ngrok-api-gateway.yaml
With the ngrok Kubernetes Operator deployed and configured as an API gateway,
your API service is now publicly available at {YOUR_NGROK_DOMAIN}. You can now
test your API gateway and service.
curl https://{YOUR_NGROK_DOMAIN}
You'll see a response like the following:
{"message":"Pong from ngrok!","host":"{YOUR_NGROK_DOMAIN}","client_ip":"{YOUR_IP_ADDRESS}","method":"GET","url":"/","time":"2024-10-16T13:51:37.836Z","status":200}
Step 3. Set up Traffic Policy to shape traffic into/out of your API service
ngrok's Traffic Policy module allows you to conditionally act upon traffic as it arrives and departs your API gateway. In a Kubernetes context, Traffic Policy builds on top of the existing YAML manifests you already use to declare your deployments and services.
When the ngrok Kubernetes Operator initiates in your cluster, and your
HTTPRoute configuration contains one or more filter
dictionaries that reference the NgrokTrafficPolicy CRD, the Operator pipes the
raw YAML to ngrok's network to provision the action and enforce it upon incoming
and outgoing traffic.
Rate limiting—one of the most in-demand API gateway features— is both quick to implement and highly flexible based on your use case.
Define a rate limiting rule
Create a new YAML file named ngrok-rate-limit.yaml with the following content:
---
kind: NgrokTrafficPolicy
apiVersion: ngrok.k8s.ngrok.com/v1alpha1
metadata:
  name: rate-limiting
  namespace: prod
spec:
  policy:
    on_http_request:
      - name: "Rate limit POST requests"
        expressions:
          - "req.method == 'POST' || req.method == 'PUT'"
        actions:
          - type: "rate-limit"
            config:
              name: "Only allow 10 requests per minute"
              algorithm: "sliding_window"
              capacity: 10
              rate: "60s"
              bucket_key:
                - "conn.client_ip"
This CRD instantiates a rate limiting rule with the following properties:
- Via the
expression, it only applies to requests with thePOSTorPUTHTTP method—all others, likeGET, are unaffected. - Allows for a maximum of
10requests within the last60s—both values are configurable to your needs. - Uses the client's IP address (via the
conn.client_ipvariable) to track usage against your capacity limit.
Check out the Traffic Policy (for HTTP tunnels) documentation for a complete view of how to combine variables, expressions, and actions to create rules that beneficially shape the traffic on your API gateway and lessen the operational burden on your API service.
Apply the Traffic Policy rule to your cluster
You must instantiate the NgrokTrafficPolicy CRD in your cluster before
you can reference it in your API gateway configuration.
kubectl apply -f ngrok-rate-limit.yaml
Update your API gateway configuration to include the Traffic Policy rule
With the CRD applied, you need to update your existing configuration
ngrok-api-gateway.yaml with a
filter,
which is a process that must be completed during the request or response
lifecycle.
Edit your existing ngrok-api-gateway.yaml file—specifically the
HTTPRoute section—to add a reference to the rate limiting policy.
---
apiVersion: gateway.networking.k8s.io/v1
kind: HTTPRoute
metadata:
  name: ngrok-route
  namespace: prod
spec:
  parentRefs:
    - kind: Gateway
      name: ngrok-gateway
  hostnames:
    - {YOUR_NGROK_DOMAIN}
  rules:
    - matches:
        - path:
            type: PathPrefix
            value: /
      backendRefs:
        - name: {YOUR_SERVICE_NAME}
          port: {SERVICE_PORT}
          kind: Service
      filters:
        - type: ExtensionRef
          extensionRef:
            group: ngrok.k8s.ngrok.com
            kind: NgrokTrafficPolicy
            name: rate-limiting
Re-apply your manifest to update your API gateway with the new Traffic Policy rule.
kubectl apply -f ngrok-api-gateway.yaml
Test the rate limiting rule
Finally, you can validate that your new rate limiting rule was deployed
successfully at the ngrok network by creating a large number of requests in
quick succession.
Run the following on your local workstation, replacing {YOUR_NGROK_DOMAIN}.
for i in `seq 1 50`; do curl -X GET -w '%{http_code}' https://{YOUR_NGROK_DOMAIN}/ ; done
Depending on the capacity value you configured in the NgrokTrafficPolicy
CRD, you should start seeing 429 response codes shortly.
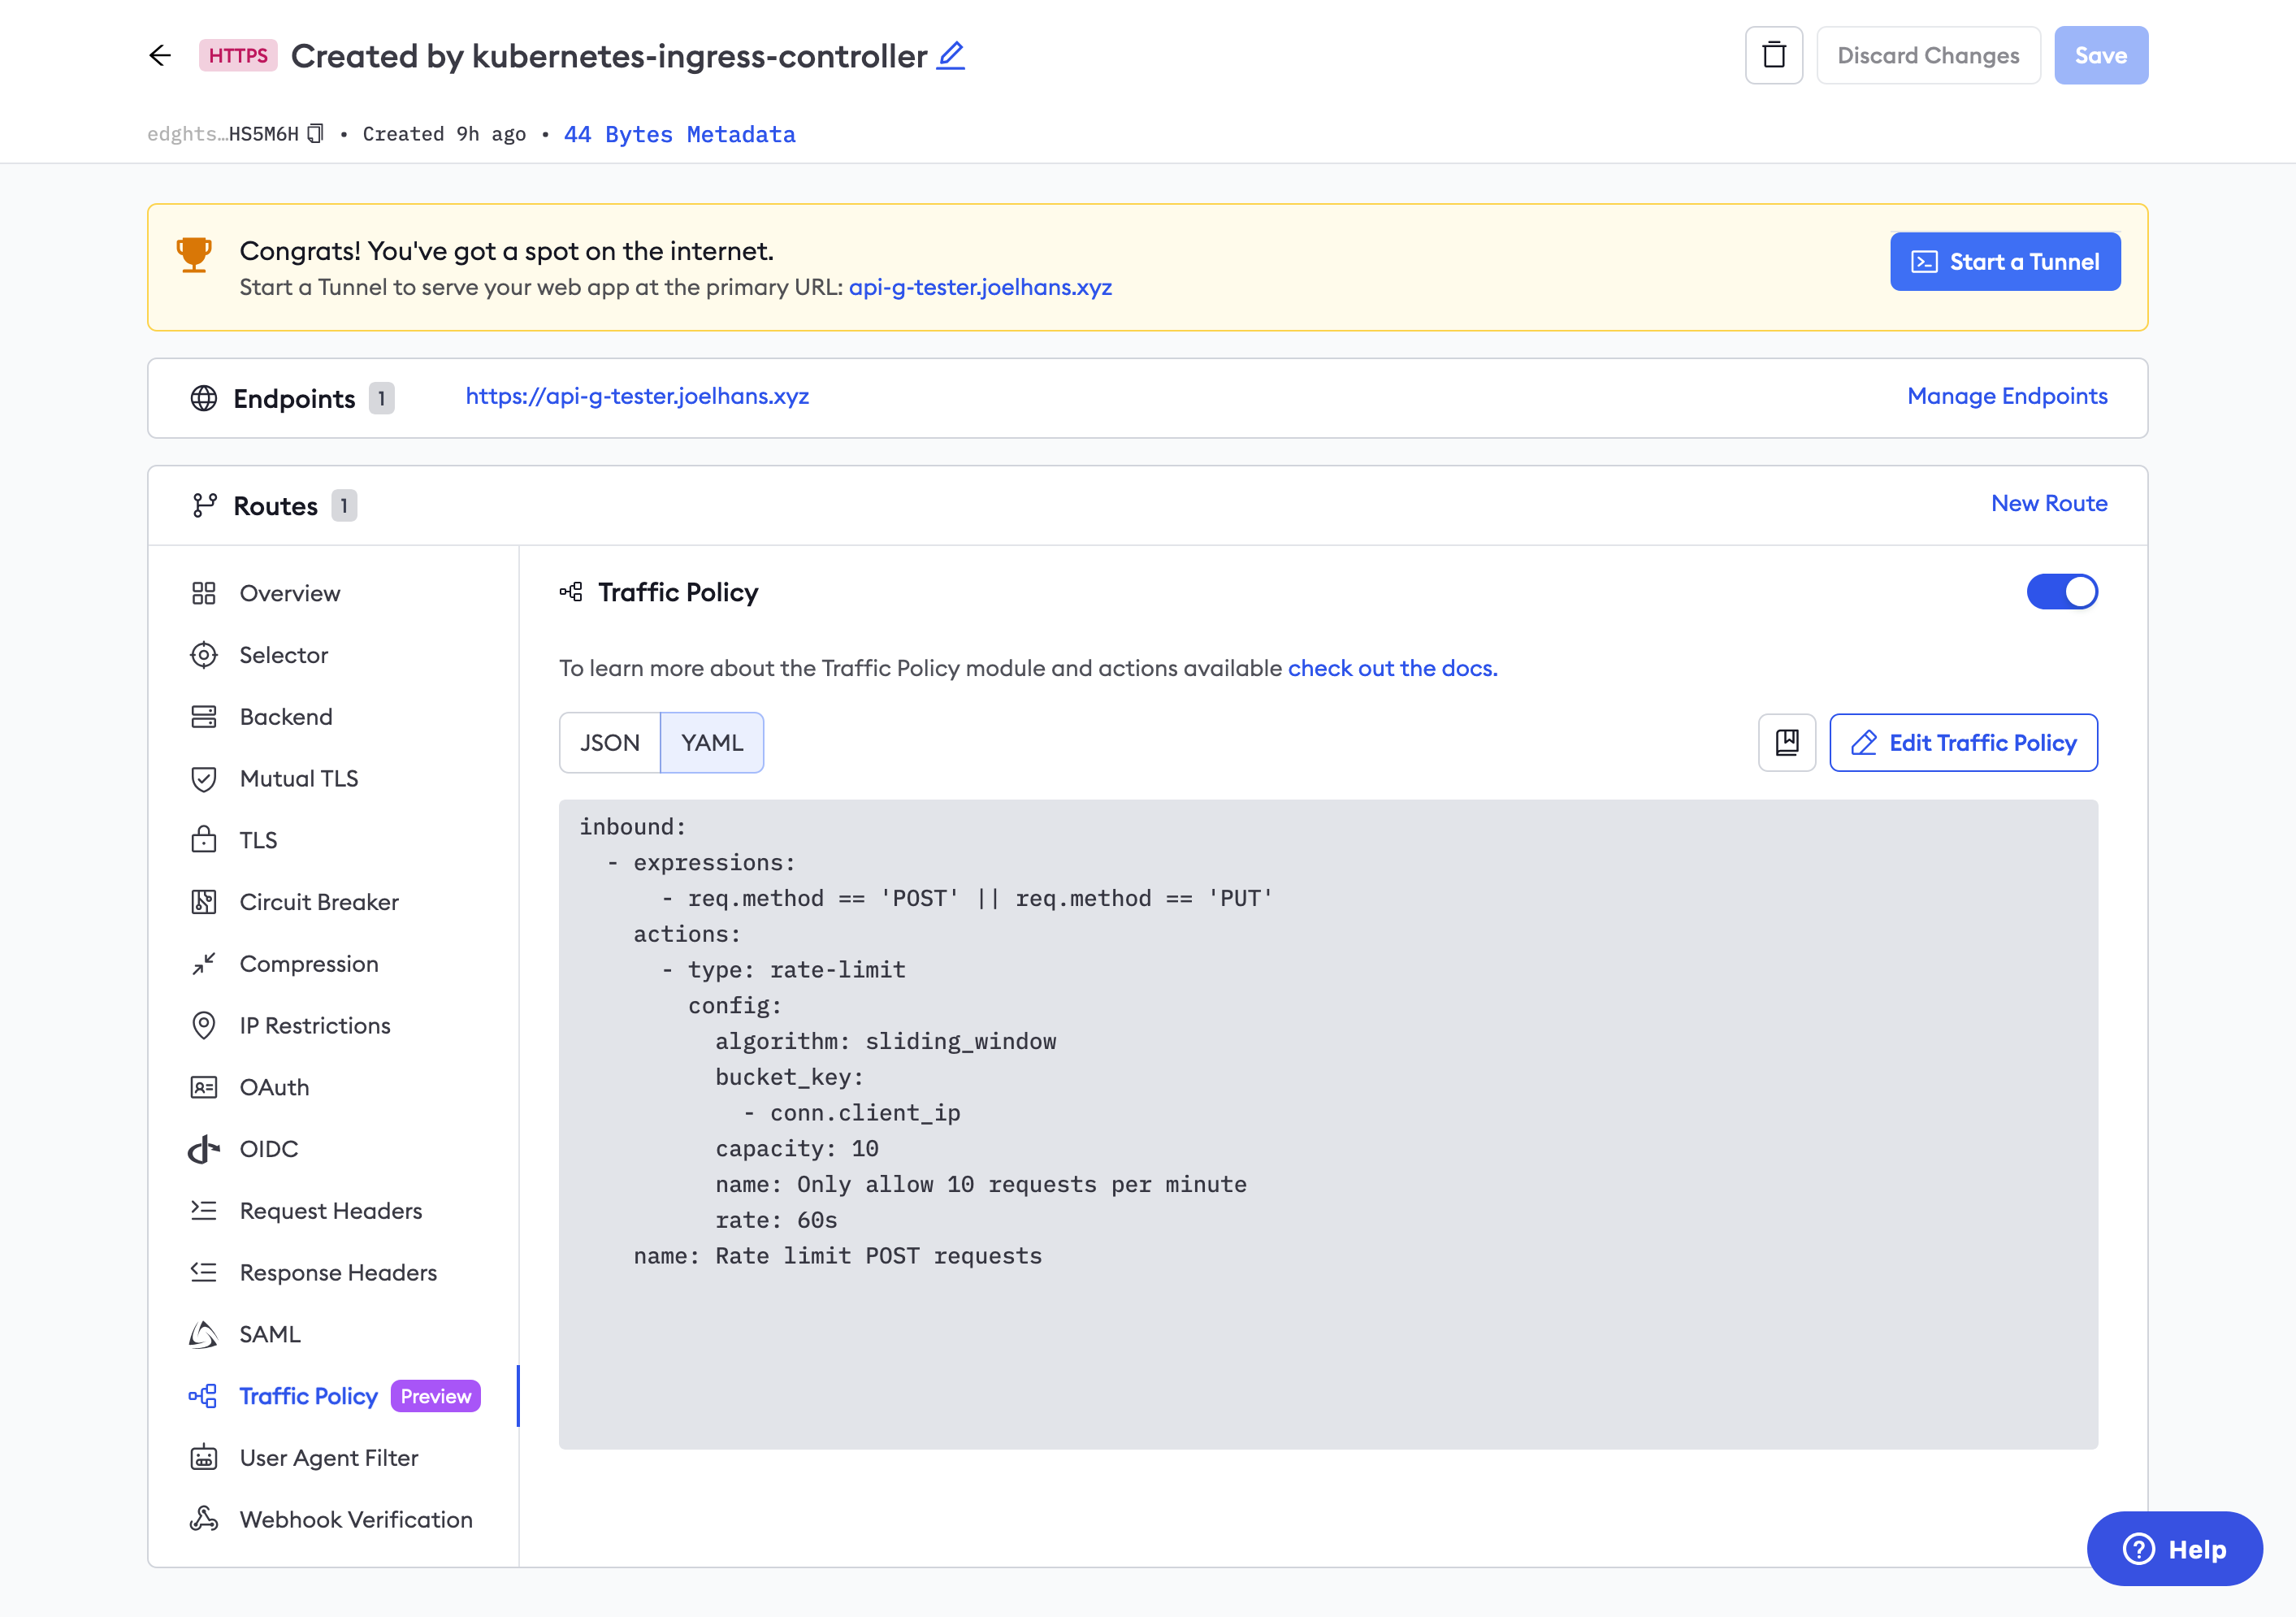
You can confirm your Traffic Policy rules in the Edges section of your ngrok dashboard. Click on the edge associated with this deployment, then one of the routes you attached your Traffic Policy rule to. Click Traffic Policy to view the rule as run on the ngrok network.
What's next?
Congratulations—you've now made your API service available to the public internet, backed by the power of ngrok operating as an API gateway.
You also already have HTTP/2 enabled by default for all connections that support it. HTTP/2 gives you better performance with prioritization, multiplexing, and header compression.
Your next best step is to expand your usage of Traffic Policy actions to handle more advanced API gateway requirements:
- Learn about other ways to configure Traffic Policy with the Gateway API.
- Explore other Traffic Policy actions you can enable on your API gateway, like JWT authentication, adding headers, URL rewrites, logging, and more.
Finally, you can extend how you use ngrok as an API gateway to better match your Git-based workflows and using version-controlled, declarative, and repeatable configurations with a continuous deployment mechanism like Argo CD.